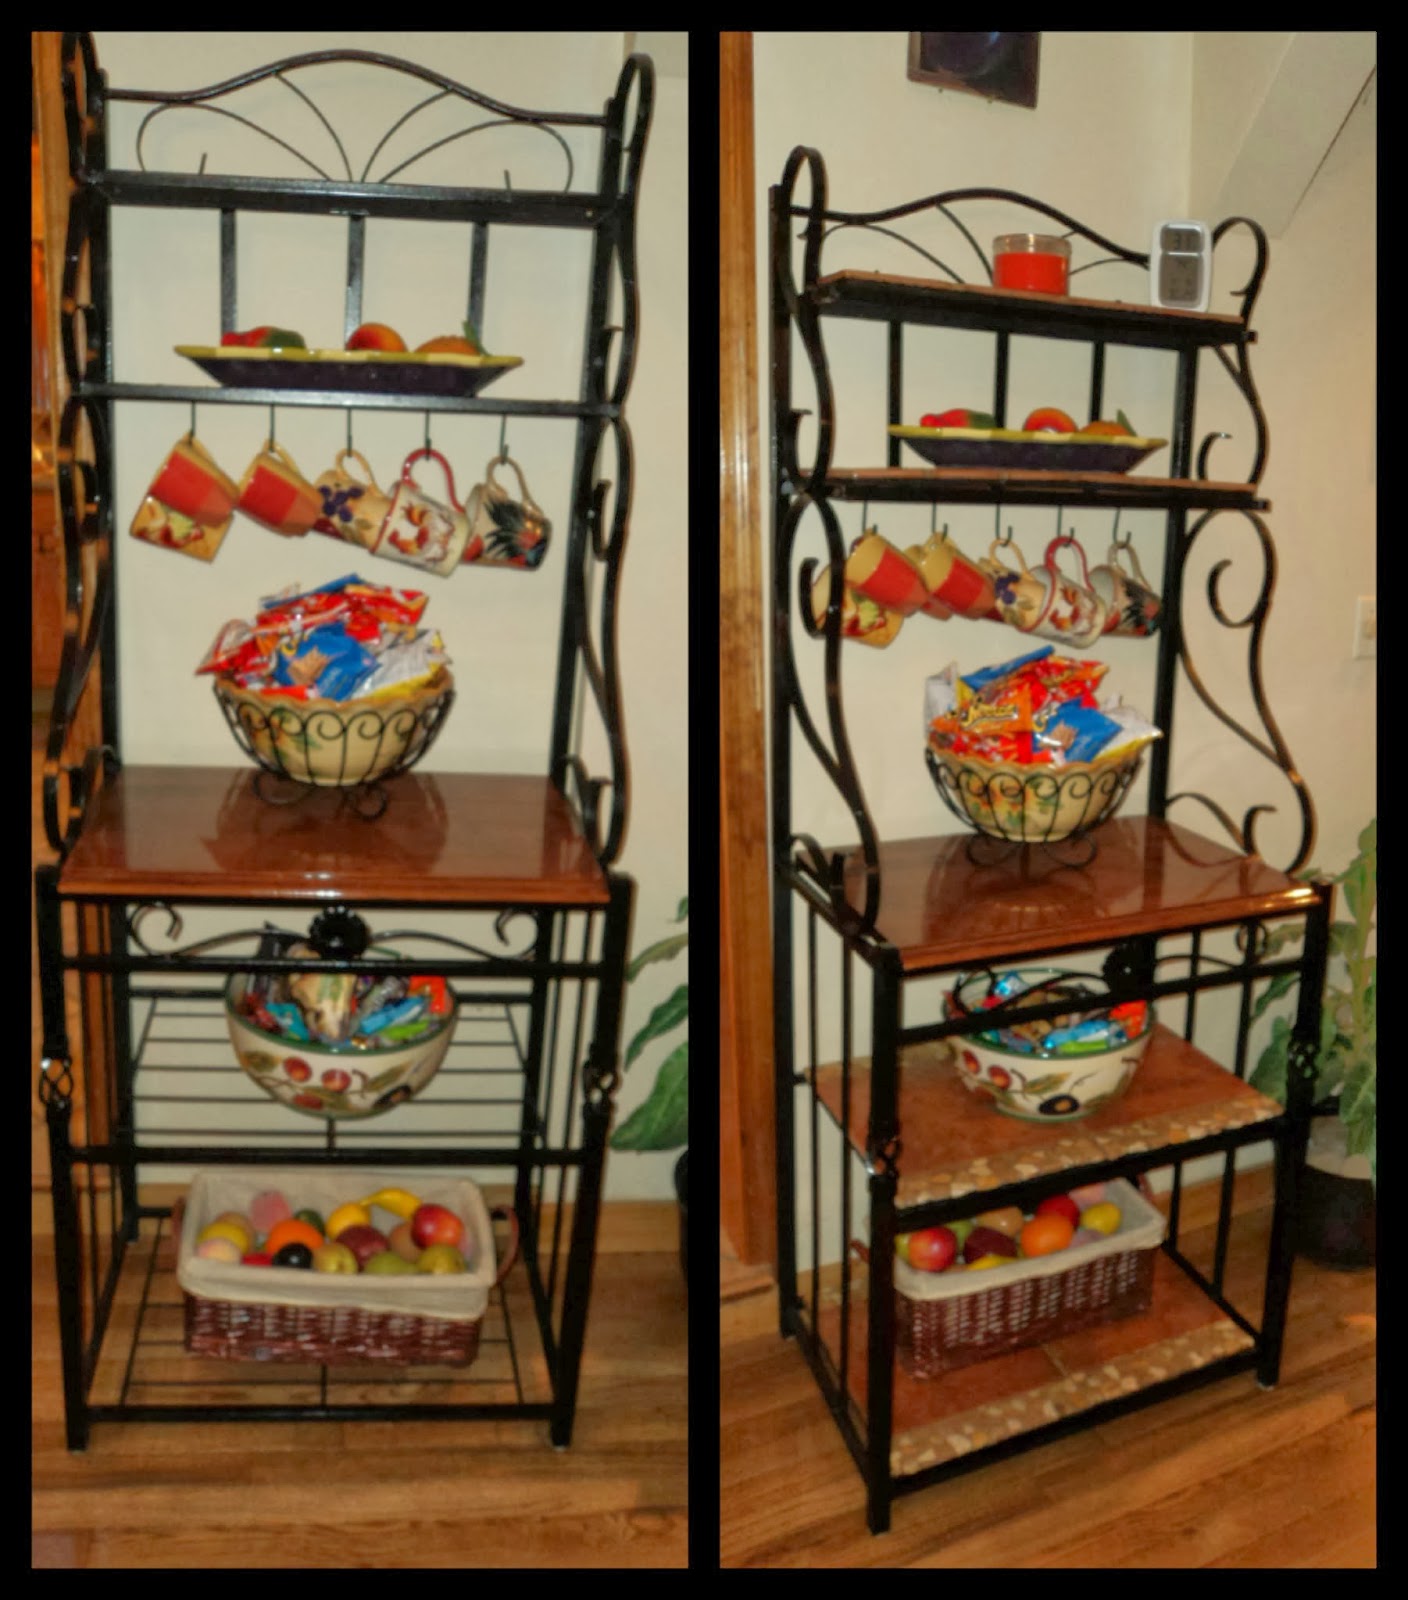
I have this old iron Baker's Rack that I have had a love hate relationship with for over 16 years. Loved it for the microwave way back when and also hated it because of the shelving.
The one wooden shelf was fine, but the other wire shelves were a struggle. Cookbooks fell through, small objects would wobble and anything with legs or feet just wouldn't sit on it. I considered giving up and tossing the whole thing out. After some thought maybe new wood shelving could be more suitable. BUT, I do like tile and this was not a work-space, only storage or display. So there ended my wire shelf dilemma:
 |
| Before and After |
 |
| Not so friendly wire shelving |
 |
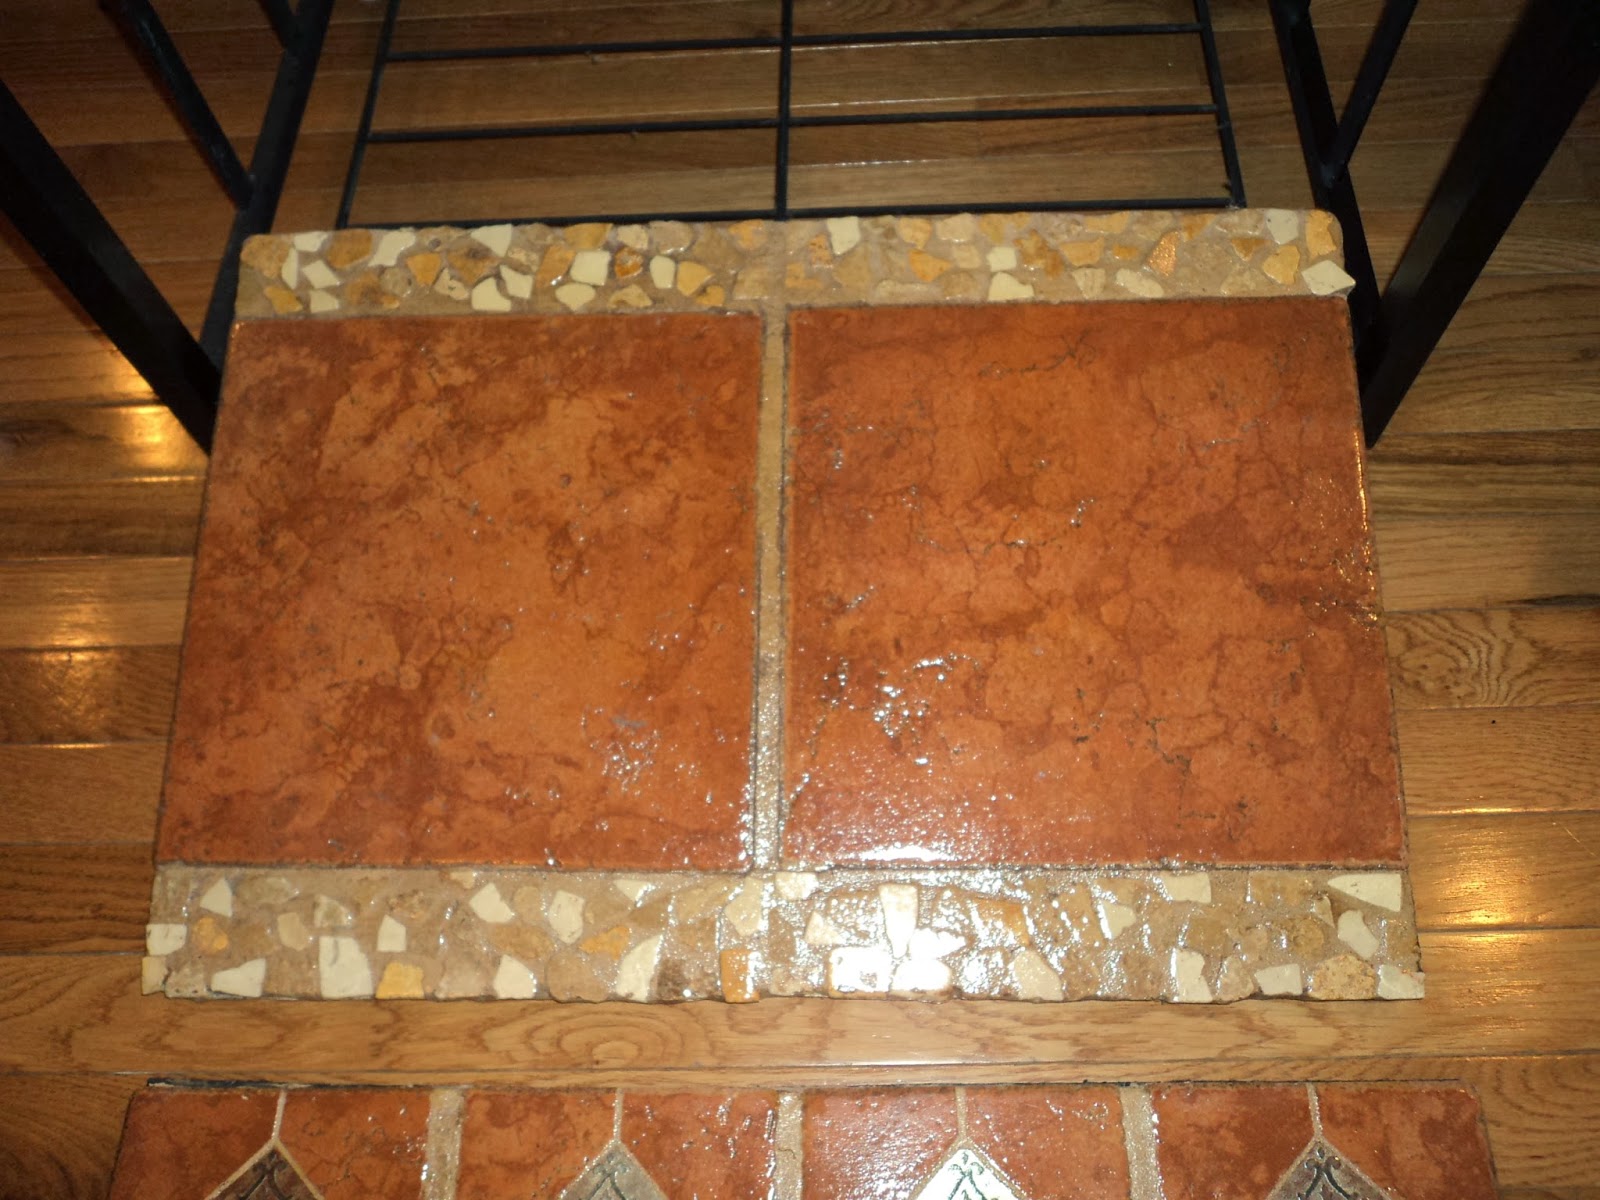
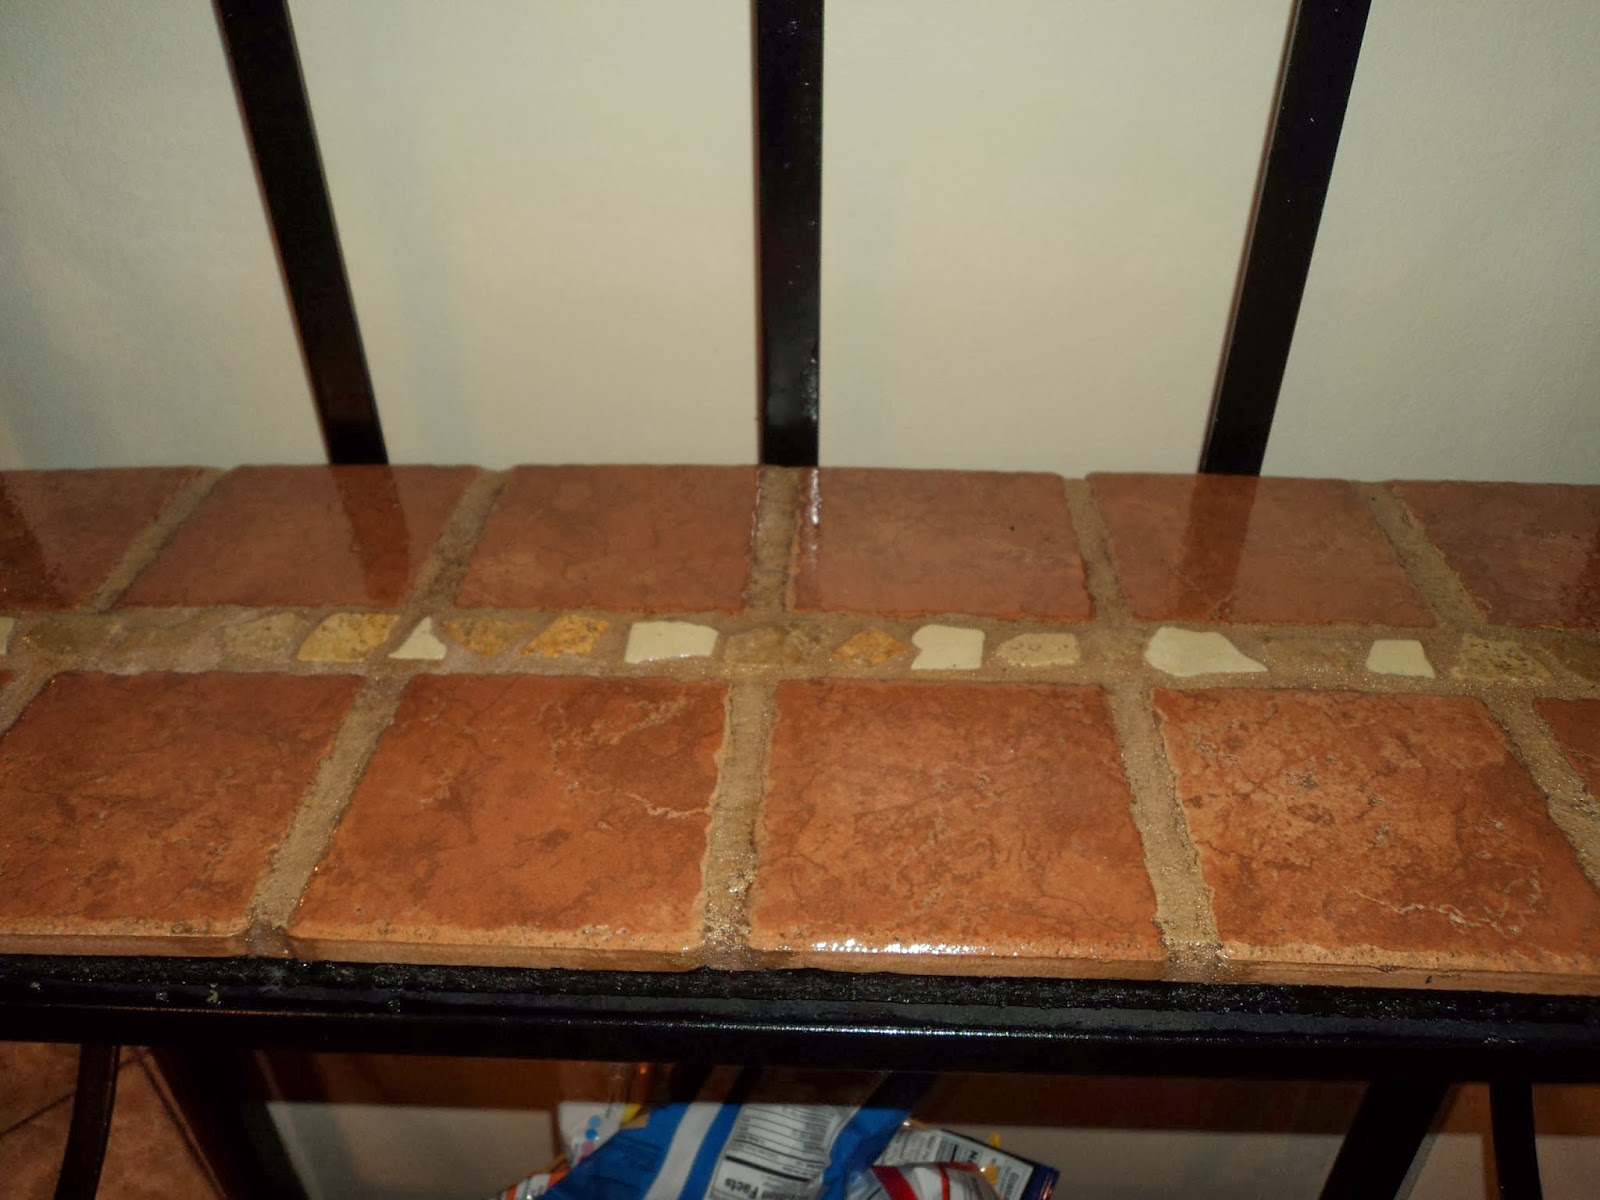
Some boards cut to fit, with some new tiles and left overs from the kitchen tile job, some glue, left over grout, and polyurethane.
|
 |
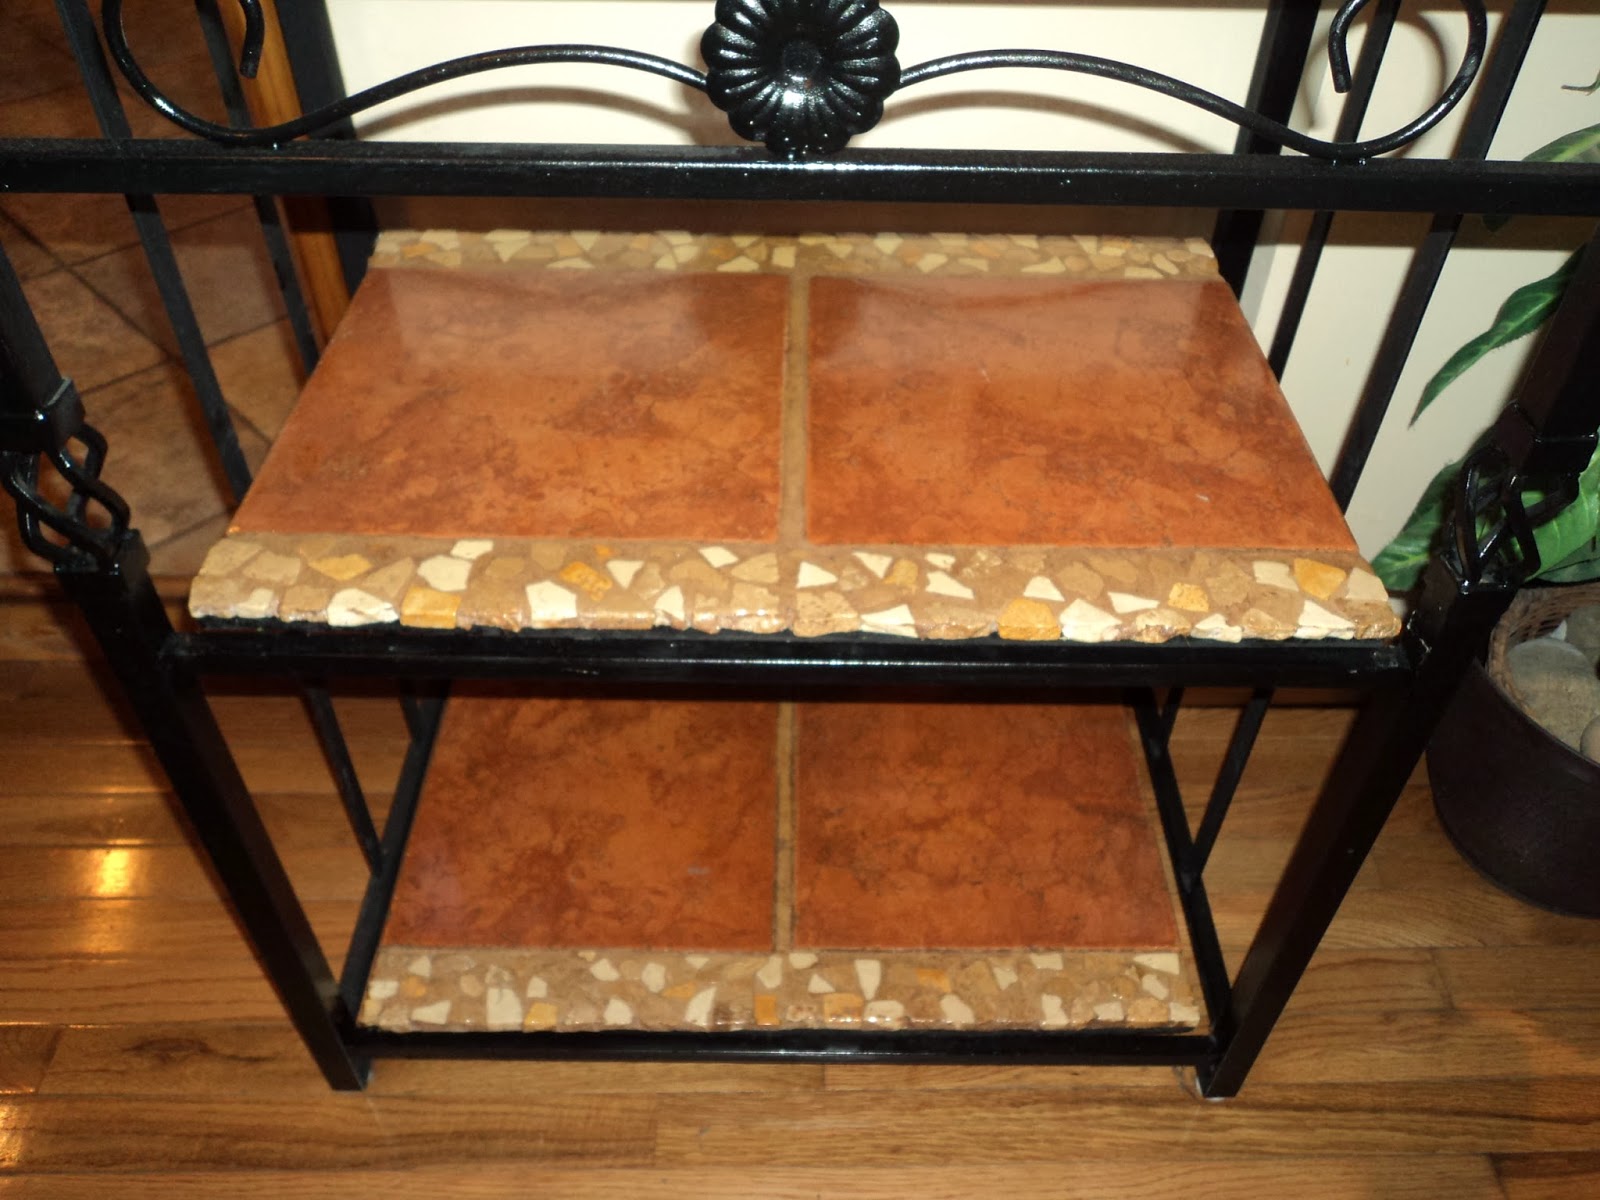
| Two top shelves |
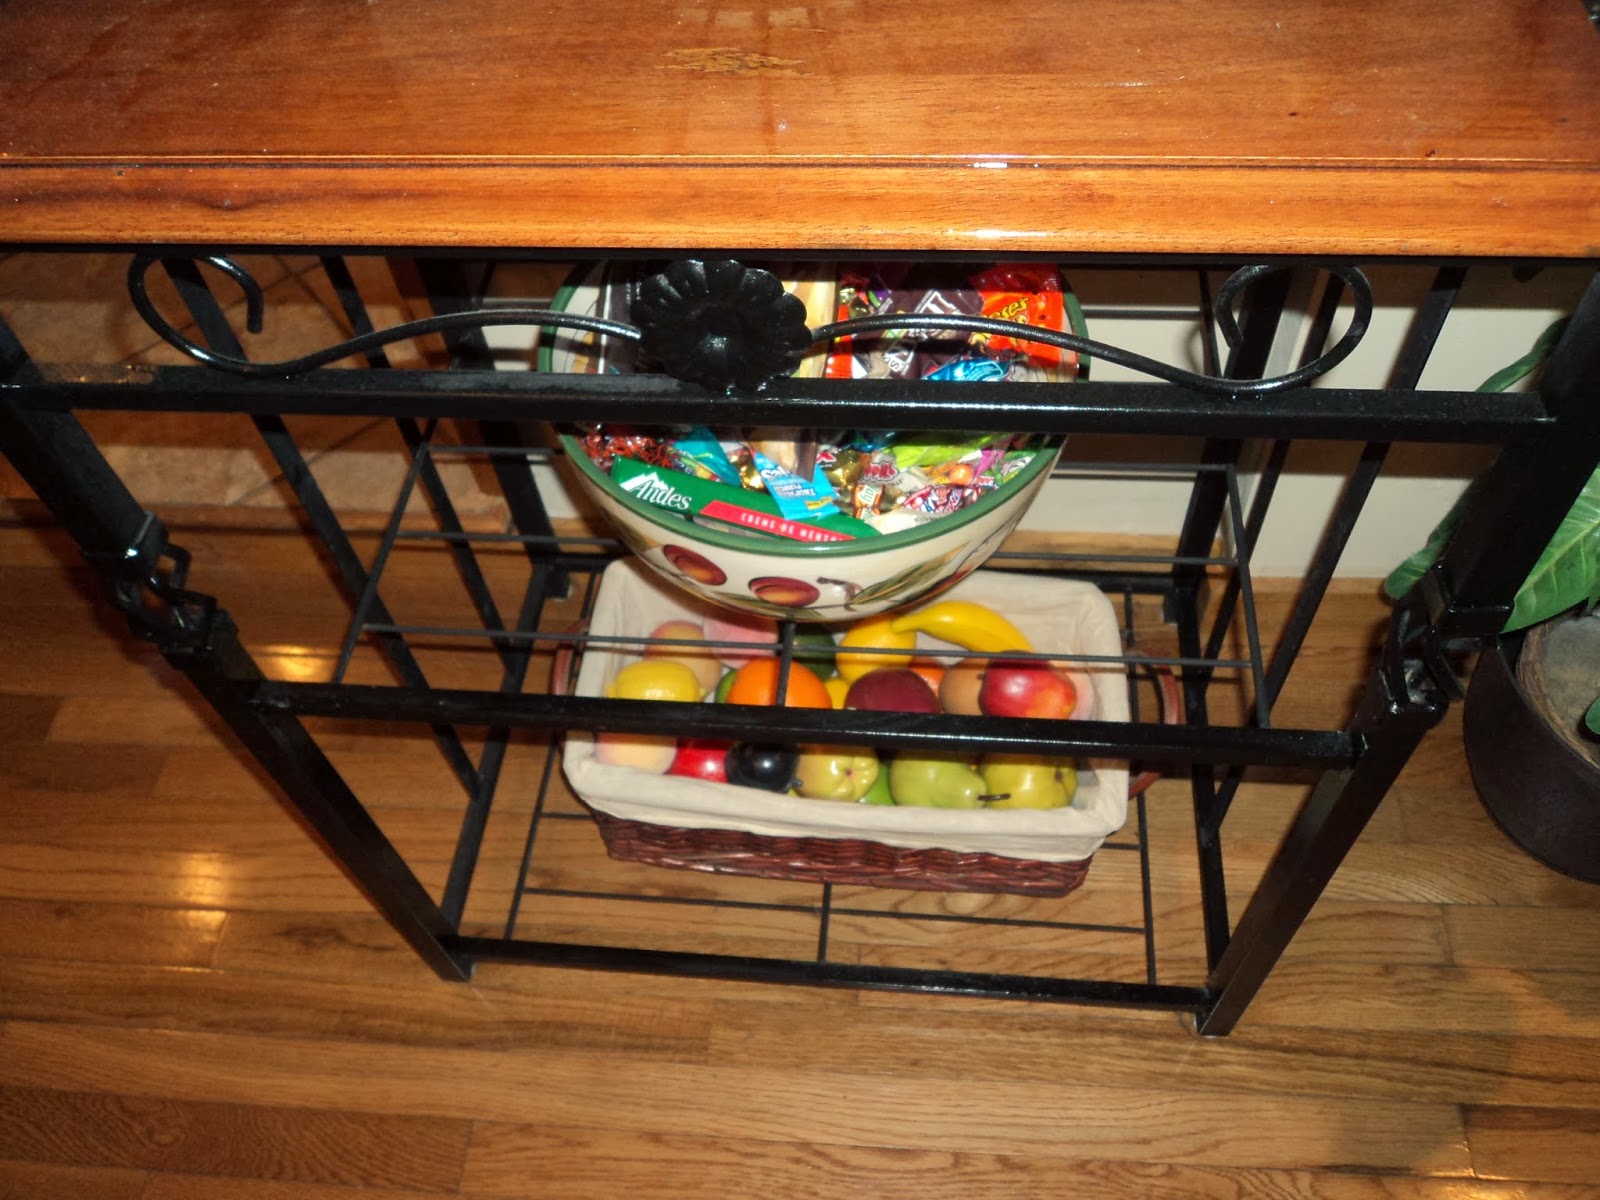
 |
| Two bottom shelves |
 |
A little black enamel paint all around the edges of the boards to blend in with the black iron
|
 |
Usable shelves.
|
1. Measure shelving areas
2. Cut plywood or particle board for each shelf
3. Layout tile design
4. Glue the tiles to the board/shelves
5. Grout
6. Clean well from grouting material
7. Paint all edges of the boards to conceal
8. Polyurethane surfaces for easy wiping and dusting
9. Slide into place